

To install a body kit, test-fit every piece before anything is fixed. Clean and degrease the bumpers and sills, dry-fit the front lip, side skirts and rear diffuser, mark their positions, then fasten each part with the hardware and instructions supplied with your kit. Finish by checking gaps, sensors and ground clearance before you drive.
This step-by-step guide is for owners who want to fit a kit at home and for detailing and modification shops that install kits for customers. It covers the three lower pieces of a typical kit: front lip, side skirts and rear diffuser. If you are adding a trunk or roof spoiler as well, follow our separate guide on how to install a rear spoiler, because the surface prep and mounting checks are different on a boot lid or tailgate.
New to kits? Start with what a car body kit is and our explainer on what a front lip does, then come back here for the fitting itself.
DIY or body shop? Decide before you start
A vehicle-specific kit made for your model is a realistic home job for someone who is careful and patient. Paint and anything that involves cutting the car is where a professional earns their fee. Use this table to split the work.
| Job | Home / DIY | Body shop |
|---|---|---|
| Pre-finished front lip (e.g. gloss black) | Yes, with a helper | Optional |
| Side skirts on a vehicle-specific kit | Yes, if you can lift the car safely | Recommended if the car must be raised high |
| Rear diffuser around parking sensors | Yes, with care | If sensor holes need adjusting |
| Body-colour paint | No | Yes — prep, primer, paint and clear coat |
| Trimming, drilling or reshaping | Only if the kit instructions call for it | Yes, for anything beyond the instructions |
Tools and materials checklist
- The kit, its instructions and all supplied hardware
- Panel wipe or isopropyl alcohol, microfibre cloths, masking tape and a fine marker
- Tape measure, plastic trim tools, screwdrivers and a basic socket set
- Ramps or axle stands — never work under a car held up only by a jack
- A drill only if your kit’s instructions include drilling, and adhesion promoter if it uses tape
- A second person for long parts
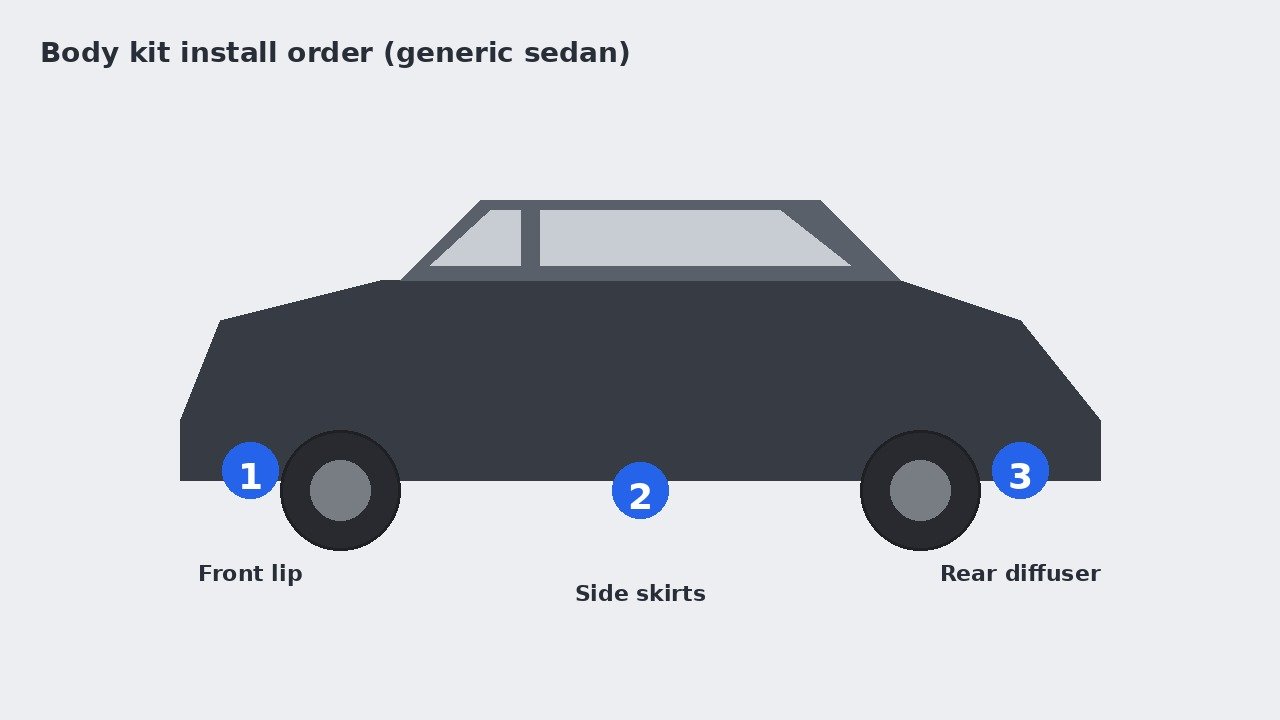
How to install a body kit: the 7-step overview
- Unbox and inspect every part and fixing.
- Decide on paint — pre-finished or body colour.
- Clean and prep the bumpers and sills.
- Fit the front lip — dry-fit, mark, fasten.
- Fit the side skirts — line them up with the arches and doors.
- Fit the rear diffuser — work around sensors and the number plate area.
- Check everything — gaps, sensors, clearance and fasteners.
Working front to rear keeps the side line consistent: the skirts pick up where the lip ends and the diffuser finishes the line.
Step 1 — Unbox, inspect and match the parts to your car
Open every box as soon as it arrives. Check each piece for transit damage or cracked mounting tabs, and count the hardware. Lay long parts such as side skirts flat indoors for a few hours before you test-fit. Then hold each part against the car: a kit made for your model should follow the bumper corners and sill line without forcing, which is the main difference between universal and vehicle-specific body kits. If a part needs a lot of pressure to meet the body, stop and send us photos before you go further.
Most Marvix exterior styling parts are ABS, with some PP options. Both are light, tough plastics that sit well on a bumper, but they behave differently under paint and heat. Our comparison of PP, ABS, fiberglass and carbon fiber body kits explains what that means for your installer.
Step 2 — Decide on paint before you fix anything
Paint changes the order of work. With a pre-finished part, such as a gloss black lip, you can fit it straight after the dry-fit. With a body-colour finish, the usual order is dry-fit first, paint second, final fit last. That way any small adjustment happens on bare plastic, not on fresh paint.
Ask the paint shop which primer they will use for the part’s material. For budgeting, our guide to how much a body kit costs breaks down parts, paint and labour.
Step 3 — Clean and prep the mounting surfaces
Most fitting problems start with a dirty surface, especially under the bumpers and along the sills where road film and wax build up.
- Wash and dry the lower panels, including the bumper undersides.
- Wipe every contact area with panel wipe or isopropyl alcohol to remove wax and silicone.
- Remove any trim the instructions tell you to take off, and bag the clips.
- If your kit uses tape, apply adhesion promoter only where the tape sits, and work somewhere warm and dry.
Step 4 — Front lip installation
Dry-fit from the centre outwards
With a helper, line up the centre of the lip with the grille or number plate centre, then work out to the corners. Hold it with masking tape and check it from the front and both sides.
Mark and fasten
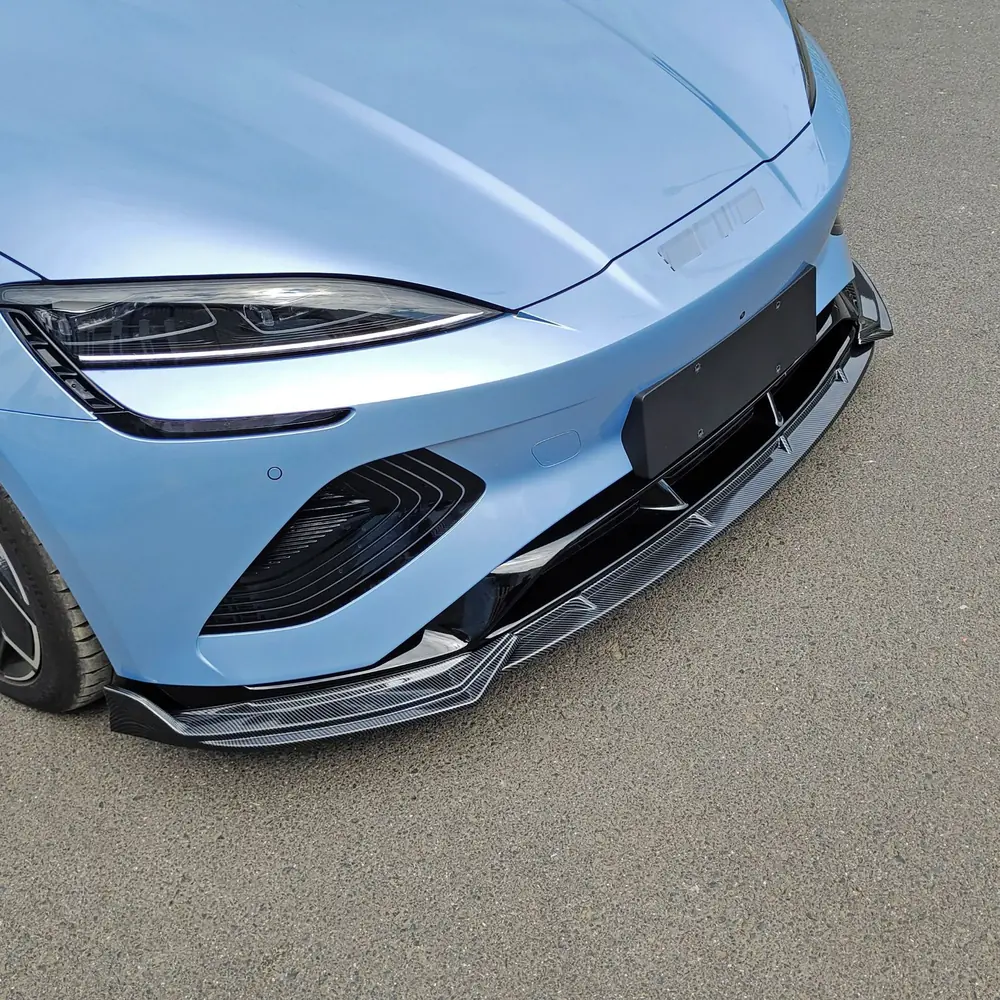
Once the gap looks even, mark the position with tape or a fine marker. Fasten the lip using the method and hardware supplied with your kit, starting in the centre and working outwards so the part does not shift towards one side. Some lips are designed to fit without drilling, such as our no-drill front bumper lip for BYD Seal. Others use screws or brackets into the bumper underside. Follow the instructions for your part rather than a general video.
Check approach angle
A lip changes the lowest point at the front, so roll the car slowly onto a ramp you use every day and watch the lip before moving on. You can browse more shapes in our BYD front bumper lips category.
Step 5 — How to install side skirts
Side skirts need the most measuring: a skirt that sits a few millimetres higher on one side is easy to spot.
- Dry-fit along the sill. Line the skirt up with the rear edge of the front arch and the front edge of the rear arch first, then let it settle along the sill.
- Check the doors. Open and close each door slowly. The door bottom must not touch the skirt at any point.
- Keep jacking points clear. Mark the jacking points before you fit the skirt, and make sure you can still reach them afterwards.
- Measure both sides. Measure from the ground (or a fixed point on each arch) to the bottom of the skirt at the front, middle and rear on both sides. The numbers should match.
- Fasten in order. Fix the skirt using the supplied hardware, usually from the middle outwards unless the instructions say otherwise, so the part does not creep.
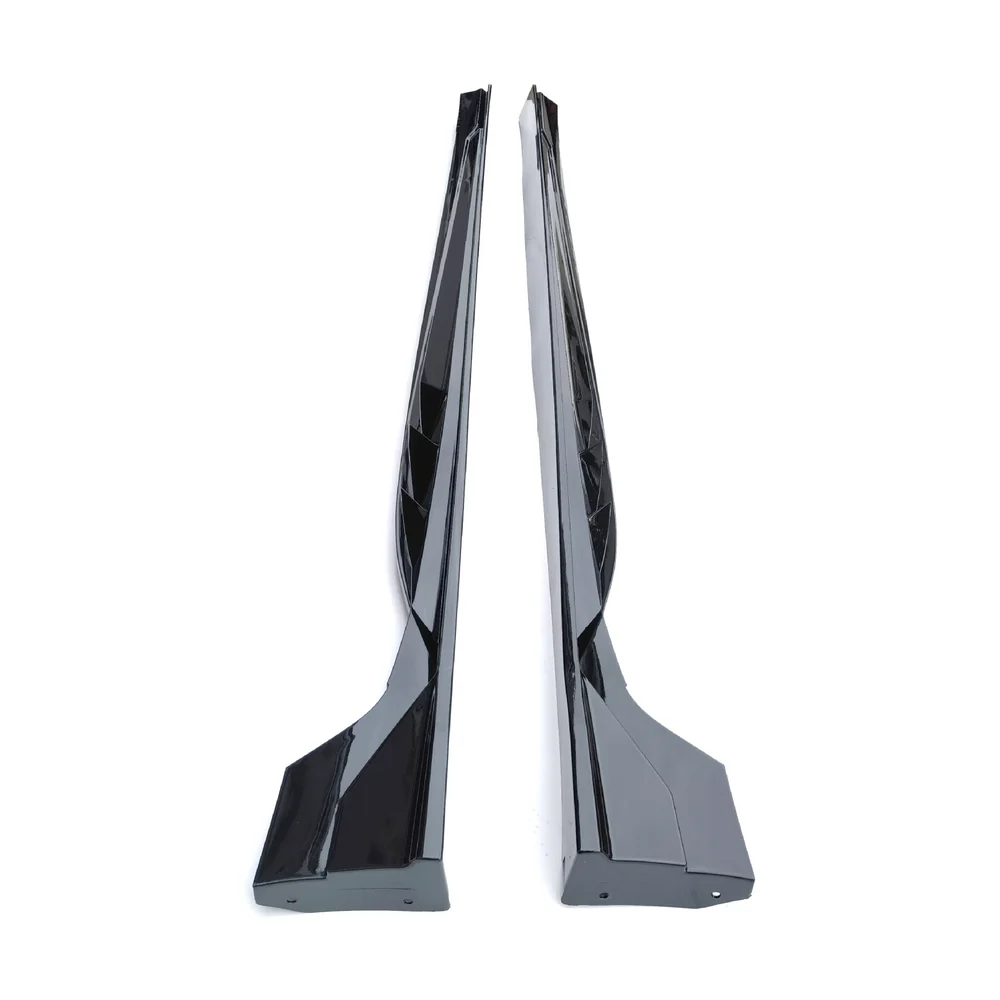
Our side skirts for BYD Seal are a good example of a skirt shaped to follow one car’s sill line, and the wider BYD side skirts range covers other models.
Step 6 — Fit the rear diffuser
The rear bumper usually carries parking sensors, reflectors, the number plate area and sometimes a tow-eye cover. Map all of these before you offer up the diffuser.
- Sensors: mark each parking sensor with tape so you can see that nothing covers or tilts it.
- Tow eye and tow bar: check that the tow-eye cover is still reachable. If the car has a tow bar, check clearance before you fix anything.
- Edges: the diffuser should meet the bumper edge evenly from left to right, with no step at the corners.
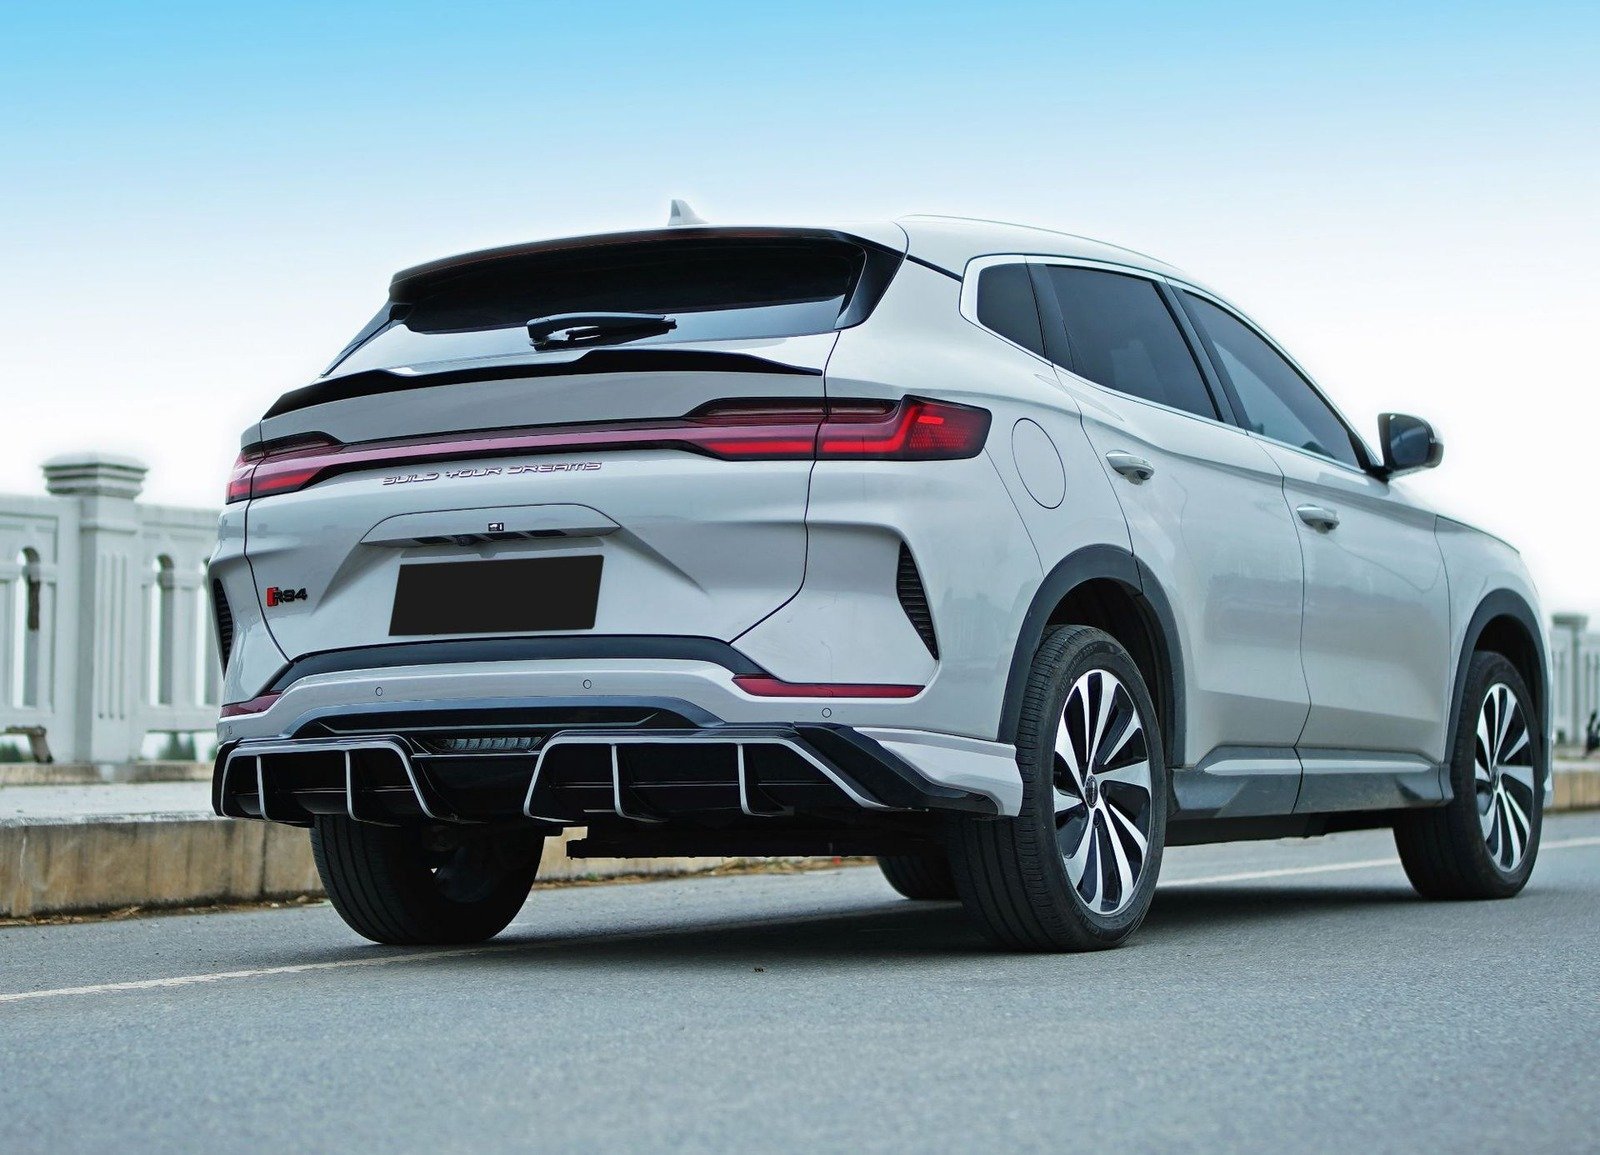
Dry-fit, mark and fasten as you did the lip, centre first. On a tall SUV bumper, such as the one our rear bumper diffuser for BYD Seal U DM-i (Song Plus) is made for, the left-to-right alignment check matters most. More options are in our BYD rear bumper diffusers category.
Step 7 — Final checks before you drive
- Sensors and cameras: select reverse and test each parking sensor; check the camera views are clear.
- Gaps: sight along each side — lip, skirts and diffuser should read as one even line.
- Clearance: nothing should touch the tyres at full steering lock.
- Fasteners: push gently on each part to check for rattles.
- Curing: if your kit uses tape, follow its curing time before washing or fast driving.
- Re-check every fixing after the first week of driving.
Adding a spoiler as well?
Many owners finish the kit with a rear spoiler. A spoiler sits on a boot lid or tailgate rather than a bumper, so it has its own prep and mounting steps. Use our guide to installing a rear spoiler. If you have not picked one yet, compare a trunk spoiler vs roof spoiler for your body type, then browse BYD spoilers and wings.
Common installation mistakes
- Skipping the dry-fit — once a part is fixed, moving it is hard.
- Painting before test-fitting — adjustments on fresh paint lead to chips.
- Working on a cold, dirty surface — the main reason adhesive fails.
- Fastening from one end — the part creeps and the gap opens up.
- Forgetting sensors and jacking points until the part is already on.
How long does it take to fit a body kit?
Fitting pre-finished parts made for your model usually takes hours, not days; most of the time goes on prep and test-fitting. Body-colour paint adds booth and curing time, which is why shops often quote paint and fitting separately. If you are still deciding how much to change, read full body kit or individual parts.
Installing body kits on BYD models
BYD bumpers carry parking sensors, cameras and, on many models, radar in the lower front. That makes a kit shaped for your exact model worth the effort. Marvix lists exterior parts by BYD model, so start from BYD body kits or pick your car from BYD car models. Seal owners can go straight to the BYD Seal accessories archive or our BYD Seal body kit guide.
Every Marvix exterior part comes with fitment and installation support. Stuck halfway through a job? Send us your model, year and photos of the bumper and sills, and we will help.
Before you drive in a regulated market, check the local rules on exterior modifications. Our guides cover body kits in the UK and body kits in Australia.
Frequently Asked Questions
Can I install a body kit myself?
Yes, if the kit is made for your model, you have a helper and you can raise the car safely. Pre-finished parts are the easiest DIY job. Leave body-colour paint, and any cutting or reshaping beyond the instructions, to a body shop.
Do you have to drill holes to install a body kit?
It depends on the kit. Some parts are designed to fit without drilling. Others use screws, clips or brackets that need holes in the bumper or sill. Read the instructions before you start, and only drill where they tell you to.
Should I paint a body kit before or after installation?
Test-fit first, then paint, then do the final fit. That way any adjustment happens before the paint goes on. Pre-finished parts, such as gloss black pieces, can be fitted straight after the dry-fit.
How do I install side skirts so both sides match?
Line each skirt up with the wheel arches first, then measure the height at the front, middle and rear on both sides before you fix anything. Check that the doors open without touching and that the jacking points stay reachable.
Will a front lip or rear diffuser affect my parking sensors?
A part that is shaped for your model should leave the sensors clear. Still, mark each sensor before fitting and test them all in reverse afterwards. If a sensor beeps constantly, check that nothing covers or tilts it.
Fitting kits for customers? Stock them with Marvix
Marvix is a one-stop BYD partner, combining a BYD vehicle-export background with exterior parts, accessories and export logistics. We run a dedicated plastic parts production line with in-house tooling, a large mold library and a 2,000+ m² warehouse and production site, and many BYD models are already tooled.
1-piece samples and retail orders are accepted, with tiered pricing for larger quantities. Listed parts are usually in stock, and orders under 100 sets ship directly with no production lead time. We also offer mixed-SKU orders and dropshipping. We can check fitment from a model and year, VIN, part number or photos.
Shipping terms for large parts: Brazil, Colombia and Mexico — EXW, FOB or DAP only (the buyer handles customs clearance and taxes). All other countries — EXW, FOB and DAP, plus DDP for samples, retail orders and dropshipping.
Shops and importers can start on our BYD exterior accessories wholesale page, browse BYD exterior accessories, or request a quote.


 English
 Portuguese
 French
 Turkish
 Russian
 Arabic
 Spanish